
We're all a bit geeky when it comes to tools here. A lot of us have worked in shops and have a variety of tools in our own tool boxes that are not the box standard tool box entries.

1) A "secret sauce" item in the tool section is Lilly Lube chain oil. Connor discovered this product when he worked in a local shop in Maryland. Lilly Lube is designed and manufactured by Jason Lilly, out of Southern California. It's made of a proprietary blend of wet and dry lubes, and formulated to offer the benefits of each. Application is simple - drip it liberally on your chain, allow it a few hours to set up, then wipe clean and enjoy a noise free drivetrain for hundreds of miles to come! It doesn't splash onto your pants like a very oily wet lube does, and doesn't attract the dirt and dust like a thicker, drier lube does.

2) Reaching back into the memory banks, the JA Stein Crank pullers for TA or Stronglight cranks is one of those, if you need it, you need it, tools. The threading on TA and Stronglight cranks were, well, different, and thus won't work with a standard Park tool crank puller. Thus the great machine workers at JA Stein created these crank pullers to fulfill the needs of those of us using these great cranks.
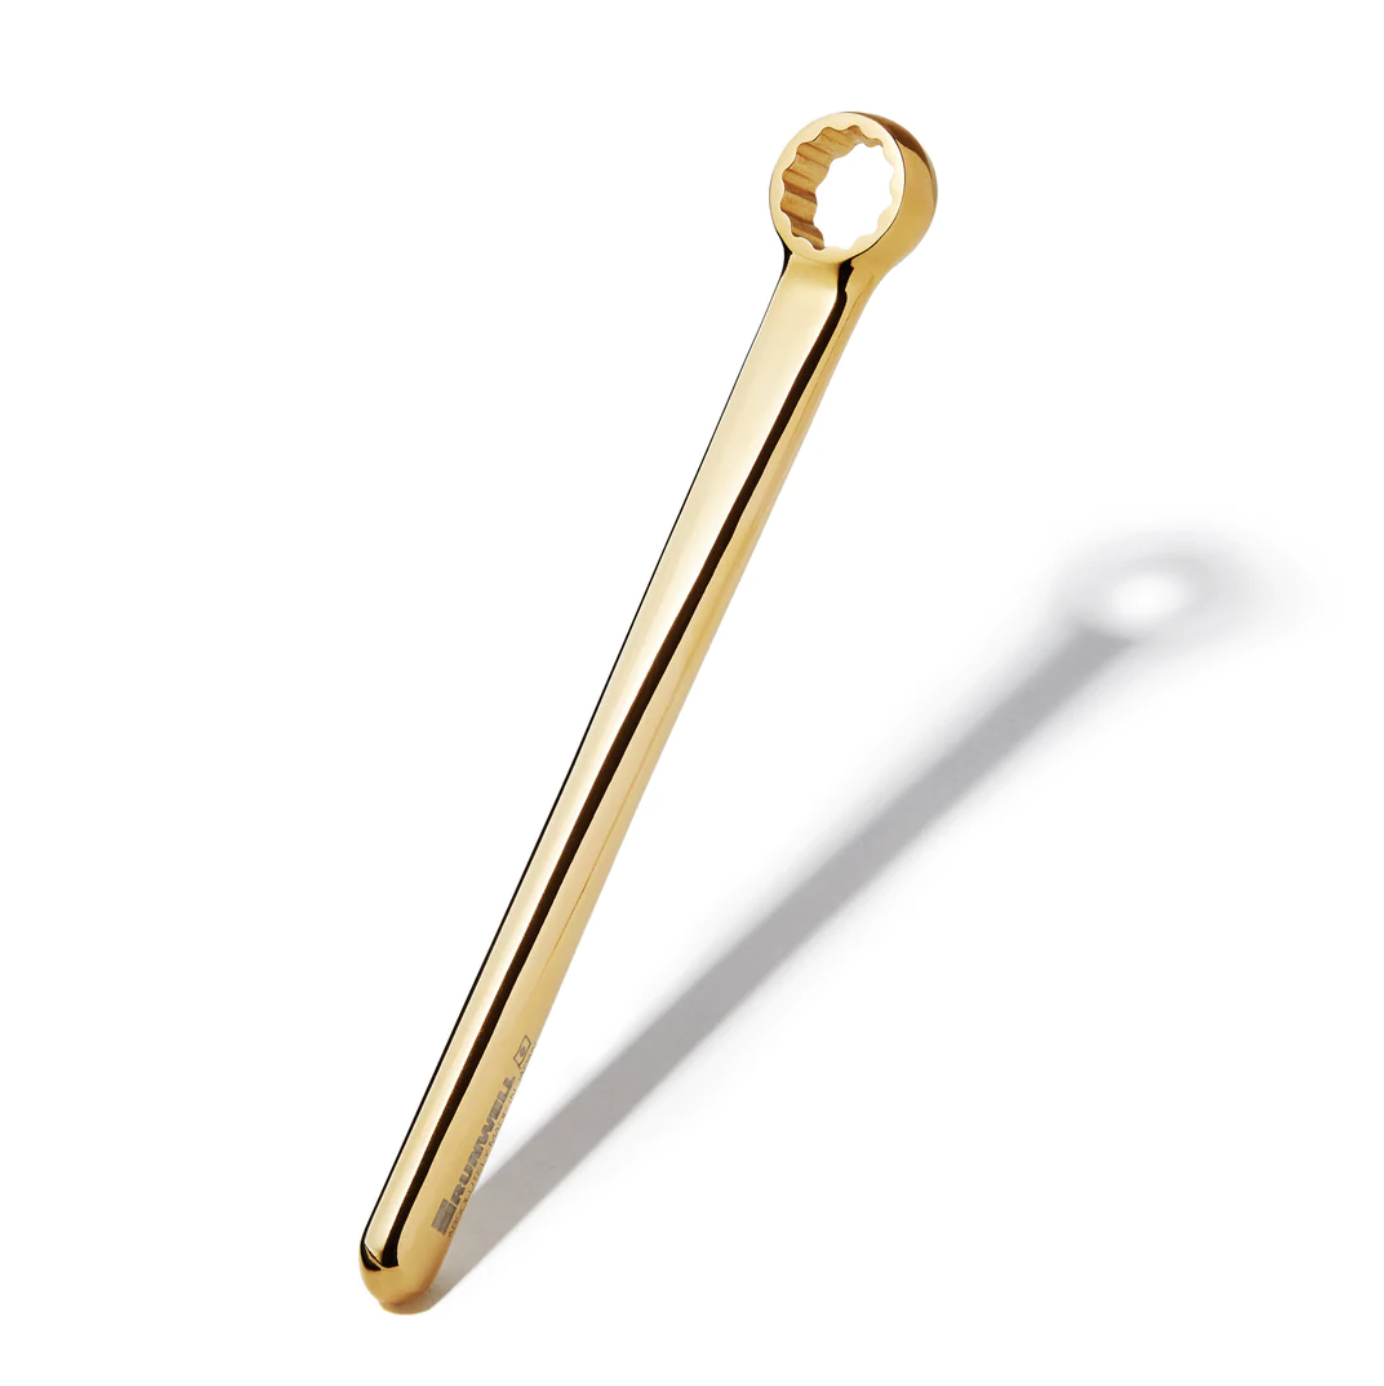
3) A product that embodies the ideal of a tool - beautiful to look at, wonderful to use and comes in silver and gold is the Runwell 15 mm wrench. This gorgeous tool is great to use to tighten up the hub nuts on your track bike or the kid's 20" wheels after you fixed that flat, again. Brilliantly thought out in terms of how the handle is shaped, as well as how the head is angled so you don't end up jamming your hand between the fork or seat stays when using it.

4) Finally, everyone needs a knife. You can go two ways with a knife. You can go classic with an Opinel #8 Carbone Knife. Works for a huge number of tasks. I use my daily when cutting up strawberries at home for example - and they are easy to keep sharp and clean. Igor has had his for years and uses it for camping. If you want to quickly patina the carbon blade, check out our article about using onions for a quick patina!


5) On the more modern side of the spectrum, the Expedition #8 Knife is the do-all knife that can handle almost any situation. The stainless steel blade is a mix of plain edge and serrated which is useful for: cutting rope or tomatoes, emergency whistle built into the plastic body, and since the body is plastic, there is no worry about wood damage. You can even use the cord on the end of it to attach it to the deck rigging on a kayak or hang it at your campsite.

6) Lastly, every shop needs a good set of hex wrenches. I'd venture to say 98% of the bolts and screws on your bike use metric hex heads - on Adrian's Neutrino the only bolts that aren't hex are the dropout screws. Look, I know these VAR wrenches aren't cheap, but they exceptionally nice. They're a joy to use and their tolerances are excellent. We use them every day and they haven't failed us.


.jpeg)


.jpg)


