by Connor

With our recent shipment of Neutrinos having arrived earlier this month, and with mini-velo wheelsets on the way any day now, we decided it would be a good idea to brush up on the technical specs of the bike itself and offer some suggestions of how to build up a complete bike. This quick and concise rundown is designed to help you find the correct build and fit for your own Neutrino Mini Velo.
Size Guide
You're not going to start a build kit without buying the right frame size first, so let's get into fit. Our Neutrinos come in Small, Large, and XXL. Because of the non-traditional nature of the frameset, we designed the Neutrino in only three sizes to span a broad range of heights and body dimensions.
The Small is best suited for folks in the sub - 5'6" (167cm) height range. Because of the low-slung, BMX-esque shape of the frame, inseam and stand over are largely irrelevant when it comes to frame size, making this bike ideal for folks struggling to find a bike small enough for them. The Large is our most popular size, and is designed for folks between 5'7" (170cm) - 6'1" (185cm). The XXL is for the taller folks, designed with those taller than 6'1" in mind. A higher and longer top tube boasts proper fit in a tiny package, and the steel construction of the frame provides a sturdy foundation for all sorts of tall riders. The XXL size frame doesn't really fit into a checked bag, but we had a lot of people asking for a size larger than Large, so there you go.

Note that as the headtube length increases as you go up in sizes, folks with more reach looking for a more-relaxed fit may still have to add a fair number of stack spacers to find the correct fit. Keep in mind that you can always cut more steerer off and punch down the star nut - you can't add it back on. It's always best to throw the wheels, cranks, seatpost/saddle, and headset on with your desired bars, and play with height. Scoot around, coast and soft pedal, and find a generally ideal position for the type of riding you plan on doing- then add 10-20mm of stack above where your stem is mounted, and cut that much above. You can always shave that down, but if after a couple of rides, you find your stem is just a little too low, you'll be glad you waited and saved the extra 20mm or so.
Interjection from Igor: the steerer tube is steel, so feel free to stack them up as much as you want. You may get some weird looks from the Slam Your Stem Society, but I think you should embrace the tower of power.
Parts
Bars/Stem

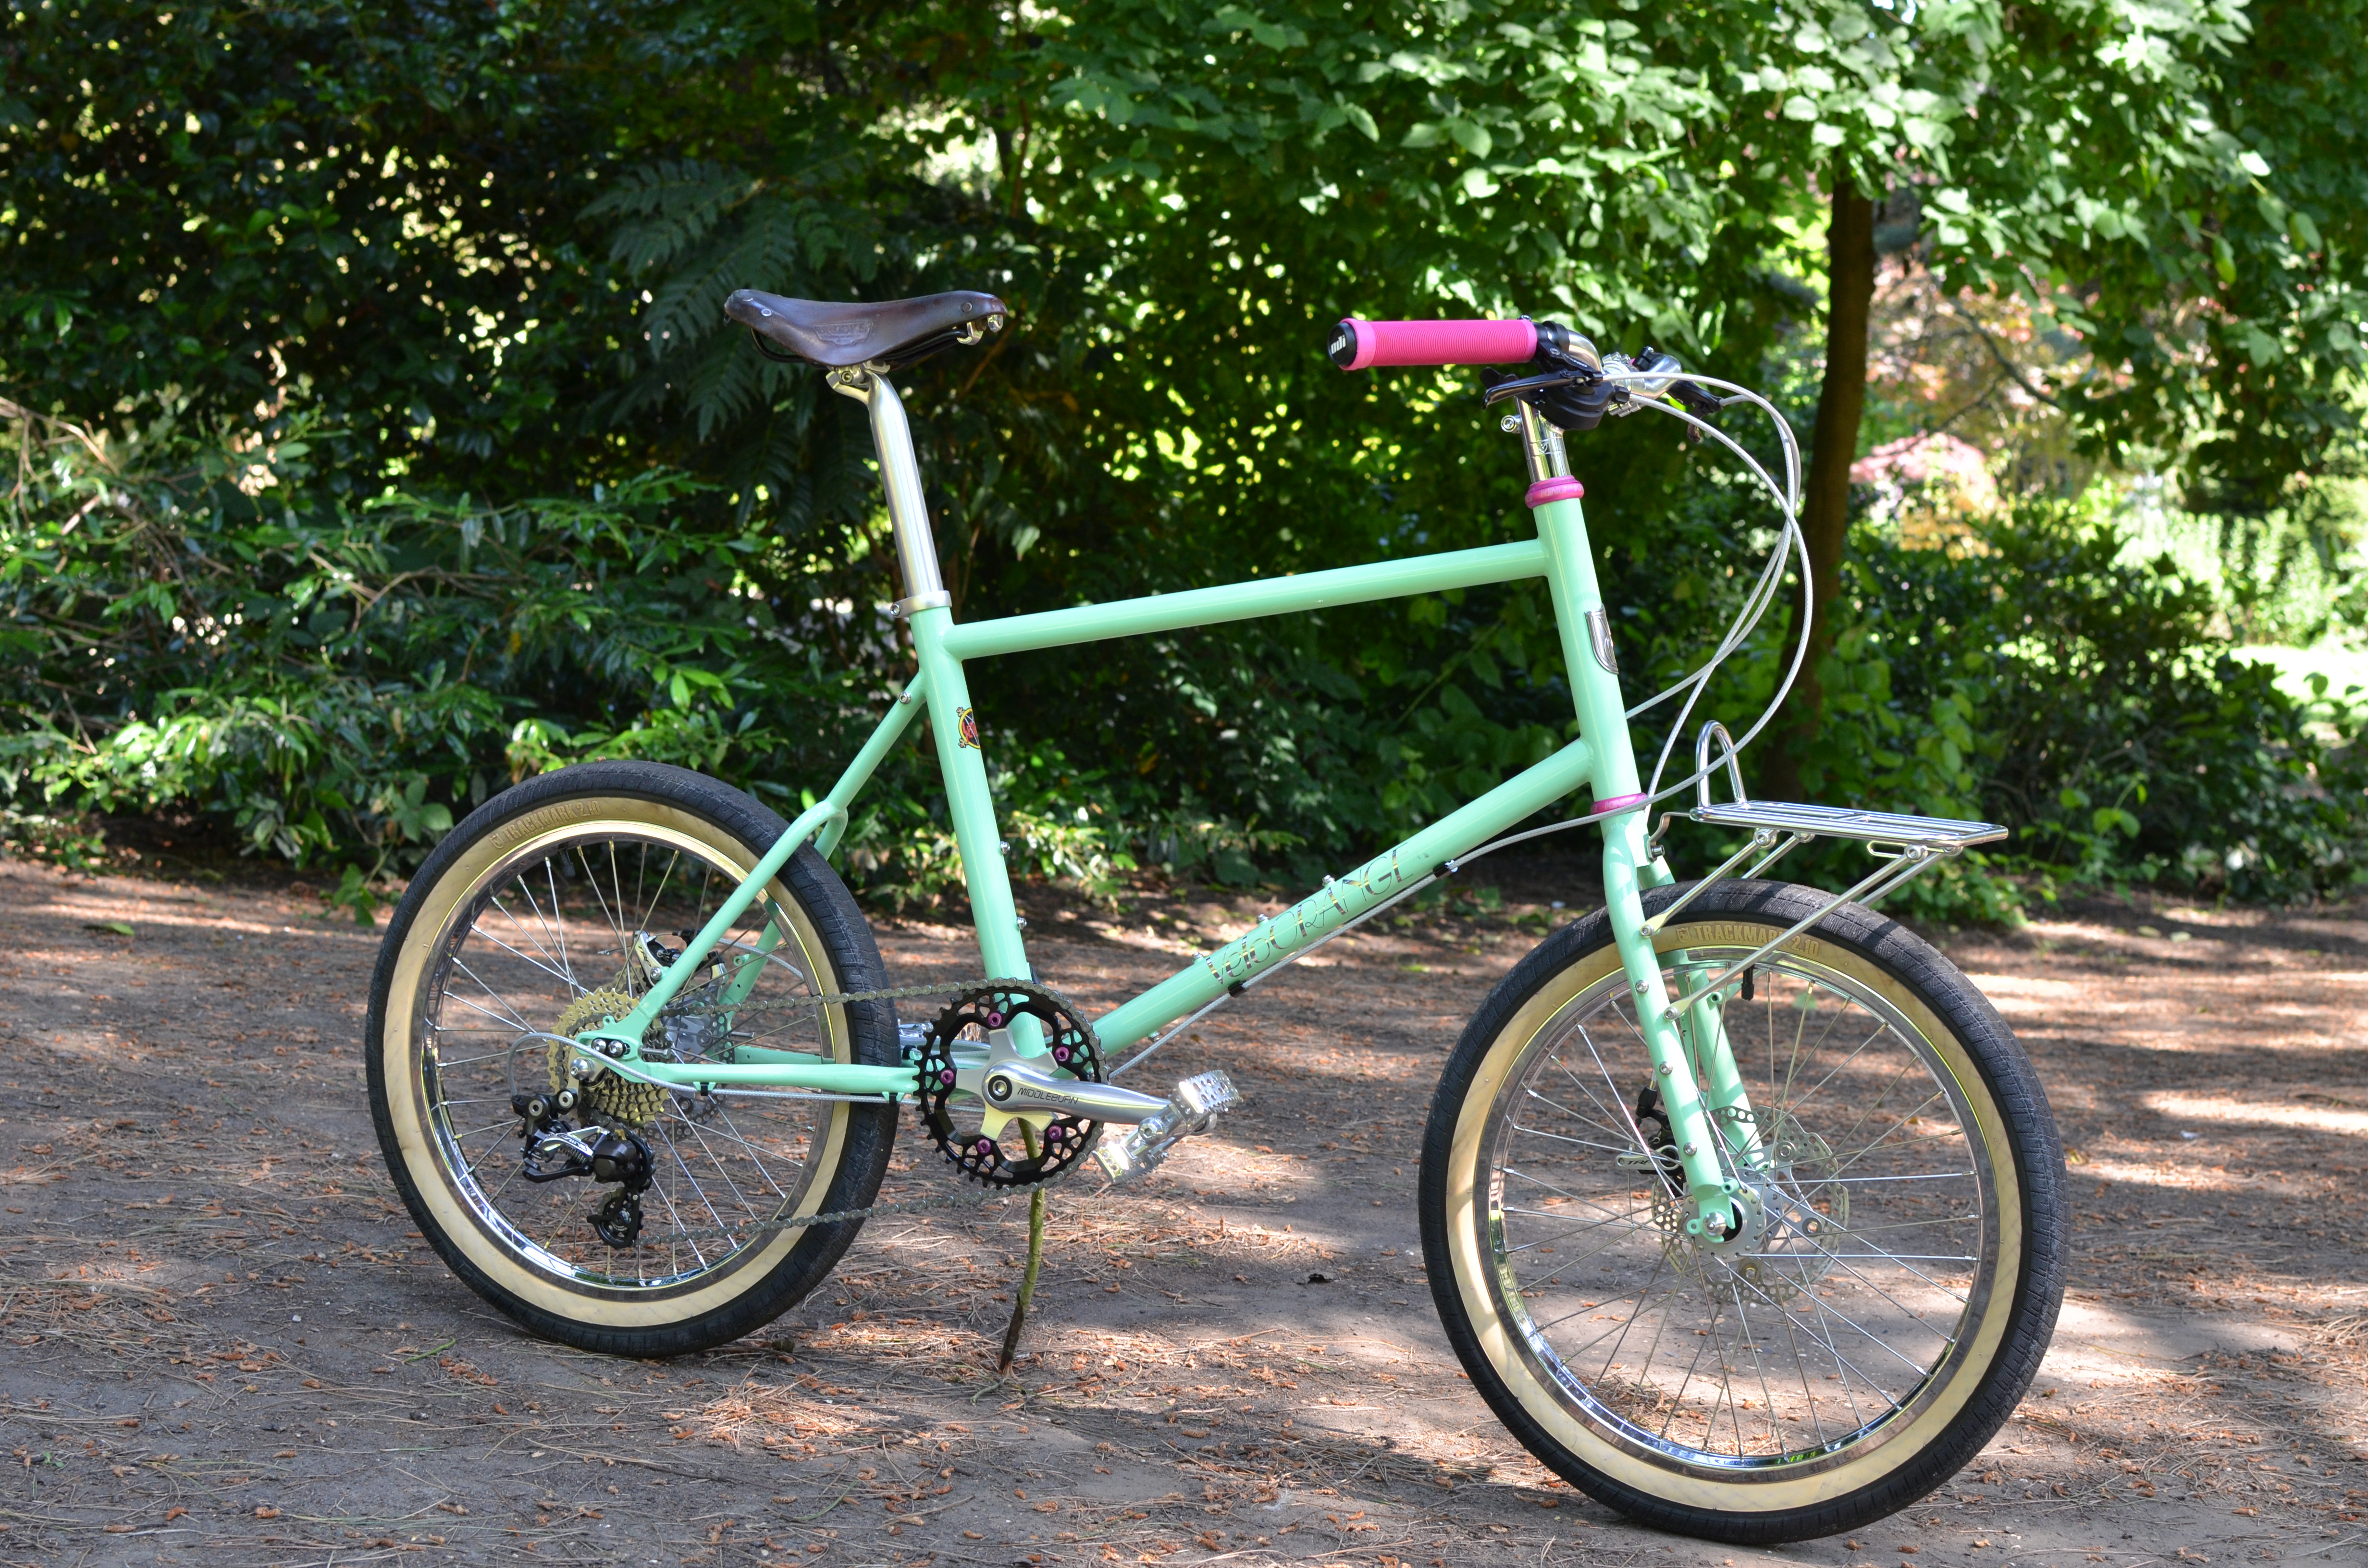
The Neutrino is a funky animal at first glance, that much is certain. However, it's the unique shape and low-slung design that allows it's rider to set it up practically however they like! Many bikes nowadays are designed solely for flat bars or drop bars. But, like the rest of our bikes, the Neutrino is designed with very neutral "effective" geometry that allows the use of either bar style. So feel free to use drops, flats, uprights, or alt-bars.
As with any bike, given the dimensions of a person and their bike, flat bars offer a wider hand positioning, bringing the arms out and the shoulders wide. This has a similar effect on reach as a drop bar with a slightly longer stem. I think back to my drop bar conversion on the All City Nature Boy I rode at GRUSK last year (I wrote a blog post about converting this bike from flat to drop bar). I was running a 780mm riser bar with a 40mm stem. After going to a 44mm wide drop bar, I used an 80mm stem, and felt that I was in about the same position, if not slightly more forward than before. Suffice it to say, if you're planning on running a drop bar setup, keep in mind your stem length. You may want it slightly longer than you think- it's easy to look at the Neutrino and think the reach is going to be too short.

When it comes to stems, everyone's got their own preferences. Much of this will also be dependent on what bars you run, and will affect your stack spacing as well. If you're running a riser bar or something like a Klunker, you may find that a standard, straight threadless stem is your best bet, as the shape and rise will be predicable and tuneable by adjusting stack. If you're looking for big rise and a little bit of style, some very common stems to run on the Neutrino are Cigne and Happy stems - a Cigne with a Nouveau Randonneur is perhaps our most wild looking and fun to ride Neutrino we've had here. Using riser stems also reduces the amount of steerer tube sticking out of the headset, and reduces the number of stack spacers needed - an aesthetic preference, of course.
.jpg)
Generally speaking, we tend to recommend people start with a 90mm stem. That's the most medium position for most flat or drop bar setups. You'll find pretty quickly if you need a shorter or longer stem to get a good position.
Seatpost

When we came out with the 2nd-gen Neutrino, we added a stealth-routing hole for a seat-tube exit for dropper seatposts. Obviously, you're more than welcome to use a standard, rigid seatpost, but the availability of the dropper allows more adjustability, compact size, and ease of dismount when riding in congested areas.
With either option, please note that it's more than likely that you'll be having quite a bit more seatpost sticking out of the frame than you would on a standard bicycle. Also keep in mind that if you're on the taller or heavier side, you want to make sure that you have a safe amount of seatpost in the seat tube. All seatposts have a minimum insertion, so be aware. We have a long, Medium Setback Seatpost we recommend for the Neutrino.
Shifty Bits
We've done a bunch of different builds with various drivetrains, so use this as a guide from our testing. Our goal is to keep things simple so that you can enjoy the ride rather than worrying about your drivetrain.
.jpg)
The Neutrino was designed to be a 1x specific bike. That is, because of the positive bottom bracket rise you need to buy a specific mini-velo/folding bike front derailleur with a 35.0mm clamp - which according to my Google-fu does not exist.
.jpg)
Our suggestion is to use a road/CX 1x crank. The Neutrino has a 68mm bottom bracket shell (English threading) so you can run a square taper setup like our 1x Crankset with Narrow-Wide Chainring (coming back in stock in about 1 month) or with a 2-piece crank like a Sram Apex, Shimano GRX, etc. You can fit up to a 48-50t 1x chainring, but the larger chainring you go, the weirder the angle gets between your cassette cog and the ring, making for delayed shifting and less slack in the chain to make up for chainline. We've found that 42-44t is the sweet spot for most builds.
The rear end uses 135 disc QR spacing, so any modern QR disc hub in 135 should fit. This leaves some of the drivetrain choice up to the customer, but we've always found that the Shimano HG11 freehub body offers the most versatility when it comes to sourcing and using drivetrain parts. The key for a rear derailleur is that it needs to be fairly short.
.jpg)
While standard Shimano/SRAM short-cage road derailleurs are likely the most common to be found, they can only usually handle a 28/30t max cog. If you wanted to fit a slightly taller cassette, the Shimano Zee MTB derailleur is a short cage-size derailleur that fits cassettes ranging from 11-32 to 11-36. This is the ideal derailleur for this bike, as it is small enough to not rub on the tire, but has the capacity to run up to a 36t cog.
The reason you can't use anything longer than medium cage rear derailleur is because the dishing of the wheel, and the depth of a standard cassette rear hub, results in the tallest cog being very close to inline with the widest part of your tire. Since a 20" wheel is very small, this leaves little room for a derailleur to wrap around a tall cog, while not rubbing the end of the cage on the tire, buzzing your derailleur. Trust us, we've tried all sorts of derailleurs in testing.
As far as drivetrain setups here is a sampling of our favorites:
- VO 1x Crankset, Zee derailleur, 11-28 cassette
- SRAM Apex1 Crankset, SRAM Rival derailleur, 11-32 cassette
- VO Drillium 48t, Campagnolo Veloce derailleur, 11-28 cassette - I wouldn't run this offroad since it doesn't have a clutch.
- SRAM Force Crankset, SRAM Force eTap derailleur, short range cassette - definitely on the balleur side, but was a lot of fun.

Wheels and Tires
As stated before, the Neutrino is designed only for standard 20"(406 bead seat diameter) wheels, with a 135xQR disc rear spacing, and front 100xQR disc spacing. The benefit of the Neutrino's 20" standard size is that you can use most any BMX rim (known for their durability and wider tire width), and some even come with tubeless options (oooh).
.jpg)
We sell Neutrino-specific wheelsets on our site, using our Rear and Front Disc Hubs, and Velocity Cliffhanger rims, assembled by hand at Velocity with color matched spokes. Demand is high, so be sure to sign up for product stock notifications, and keep your eyes peeled - they'll be gone before you know it.
.jpg)
As for tires, we recommend something between 2.1-2.3". That's the sweet spot for bmx and 406 tires. One thing you want to look for in a BMX tire is whether they use single or double ply construction. Unless you're hucking your Neutrino down a 7 set or doing a gnarly smith grind, go for single-ply tires. Double ply is for hard landings and tricks, and single ply is for bmx racing. Single ply is lighter and more compliant and more fun to ride for 99% of us. Of course, if you find a cool tire color.....then all bets are off on construction.
So there you have it! A basic rundown of the essentials you need to know for building up your first Neutrino. Obviously, if you have any questions, please refer to the product info page on our website, or reach out to us directly at info@velo-orange.com.