08 September, 2017

A Four Countries Tour

by Igor

Nothing could prepare us for the beauty of the countryside, Swiss Alps, and lakefront cities that were going to join us on our journey through Switzerland, Lichtenstein, Austria, and Germany before making our way to Eurobike.


After assembling and loading up the bikes at the Zurich airport, we eagerly set off for Zug. Exploring Zurich would have to wait until our return at the end of the tour.


The floaty, wide tires we selected were quickly looking like good decisions right off the bat. We started out by circuitously winding through unpaved and paved trails around downtown Zurich, sometimes while being egged on by bell-clad, grazing sheep.


Our first day out, the sun beat down heavily upon us with very high humidity. Luckily, there are lots of fountains with potable water. In Switzerland, fountains are safe to drink from unless it explicitly says "Kein Trinkwasser".


Once off the main road, our route became more of the same mix of gravel and paved surfaces. Since the rollerblading culture in Switzerland is alive and thriving, the paved sections were exceptionally smooth and could even be connected to traverse the country. Seriously, they have separate, labeled rollerblading routes through the country. Why did we ever stop blading in the States?!


We were only a few kilometers away from our destination in Zug, when a storm quickly approached off our starboard. It seems like racing storm clouds and sunsets are a requisite of every multi-day tour.


Luckily this storm passed quickly, and after catching golden hour, a Jazz and American Folk Music Festival, and the city's aviary we headed out to Lucerne the next morning. Single track, b-roads, and cobbles would greet us as the tarmac of the day.


The city of Lucerne was a marvel. The winding cobbled streets lead to medieval structures and bridges dating back to the 1400s. Markets lined the Reuss River during the day and restaurants opened their doors through the night. Nothing could beat sitting on a bench with a Vermicelle dessert and enjoying the sounds of the river running through the city.


The Swiss Museum of Transportation in Lucerne is absolutely amazing. Specifically, their automotive collection is one of the best I have ever seen. There is a small auditorium and upon request, the system will bring a car down from the wall and talk about it's design, history, and impact on the world of cars.


And you know we did the chocolate tour.


Our next destination would be St. Gallen by train. Train travel through Europe is a breeze, with stations in the majority of cities. No need to Rinko or disassemble your bike. Most regional and intercontinental (ICE) trains have a bike car, so you simply secure your bike and have a seat in the passenger area. We used a hair tie to secure the brakes, to keep our bikes in place during travel.

On a ferry, but same idea!

St. Gallen, amongst other things, is known for its meticulously maintained ancient abbey and library with literature dating to the 9th century (sorry, photos were not allowed), the university, and ridiculously good local bratwursts. The abbey's library is said to have the most perfect mix of dimensions and wood tones to be optimally warm and comforting - I'd agree. For the brats, they must be consumed with a crusty roll lest you look like a tourist. Oh, don't even think about asking for mustard, you'll get kicked out of the city.


From St. Gallen, we opted to go straight to Vaduz, Lichtenstein. The trail was mixed media galore. Large and small-stone gravel, a bit of double track, and more rollerblading routes led us towards the border crossing - a covered wooden bridge with simple markings showing which country you're crossing into.


While in Lichtenstein, we left the bikes at camp and opted to go hiking. The chairlift from Malbun took us up to the trailhead for the hike to the top of Saeris. The experience was a symphony for the senses. Fresh Alpine air, grasping rocks for scrambles, bells on livestock clanging from the valley below, clouds pouring over the mountain tops, and tasty Swiss snacks. It was basically a granola bar commercial.


Leaving Lichtenstein (fairly quickly as it is only 25km long), we doubled back and continued our journey to Friedrichschafen, Germany which would be the home of Eurobike in a couple days time. We crossed back into Switzerland, stopped in Bregenz, Austria for lunch, and finally to Friedrichschafen. Four countries in one day!

Yes, they were delicious
Our time in Friedrichschafen would only be temporary as we promptly hopped back on a train for 24 hours in Munich. I had no idea that the surfing scene in Munich would be so good!


After four busy and perpetually wet days at Eurobike we headed back to Zurich for some city exploration and final packing of our bikes and gear. Keep an eye out on the blog for more details about Eurobike and project progress.

Every time we get back from trips like these, we are always astounded by the lack of public infrastructure within our great country, the US of A. Train travel between cities is frequently prohibitively expensive if routes even exist, cohesive bicycle and public transportation infrastructure is non-existent outside of metropolitan cities, and cycling is frequently seen as an inconvenience to others.

More recently, I hear of cities in the US trying out a revamp of their city centers by preventing automobile traffic through combined blocks. Often times, these concepts are met by anger and disapproval from local business owners saying that the reduced traffic will harm their livelihood. Unsurprisingly, when it is actually tested out, opinions are turned on their heads. These areas are highly trafficked by locals and visitors. People get to experience a cityscape louder in conversation rather than tailpipes.

Here in Annapolis, we have "Dinner Under the Stars". One day a week during summer months, a portion of road on West Street gets shut down and restaurants put tables out. It really is exceptionally pleasant - especially knowing that in the morning, cars and trucks will be whizzing by on the same stretch. Many love the experience and would prefer it to be like this year-round.

I wonder if these concepts and experiments could be the beginnings of awareness and promotion of city interconnectivity, where otherwise people just drive from place to place. What does it take for this to happen? Drastically increased car taxes, gas prices going up, city center driving taxes?

31 August, 2017

Labor Day Decisions

By Scott

So now we're coming up on Labor day (Labour Day to our friends north of the border) and we just wanted to give folks a heads up that we'll be closed on Monday, September 4th. We'll do our best to get all the orders placed on Friday out before we close/pick ups happen.

(Soon enough the roads are going to be lined with trees like this around here.)

We'll be back in the office on Tuesday the 5th at 9 am answering emails, calls and welcoming folks to VO HQ.

Hope you can get out and enjoy the long weekend.


22 August, 2017

Re-stocked on VO Goodies and Bullmoose Bars

by Igor

In addition to the new Faceplate Quill Stems, we also restocked on a number of products that you guys and gals have been patiently waiting on:


In addition to VO products, we also just got in a care package from Fairweather in Japan with a bunch of Bullmoose Bars in Silver and Black finishes.

Happy riding!

19 August, 2017

Removable Faceplate Quill Stems Have Arrived!

by Igor


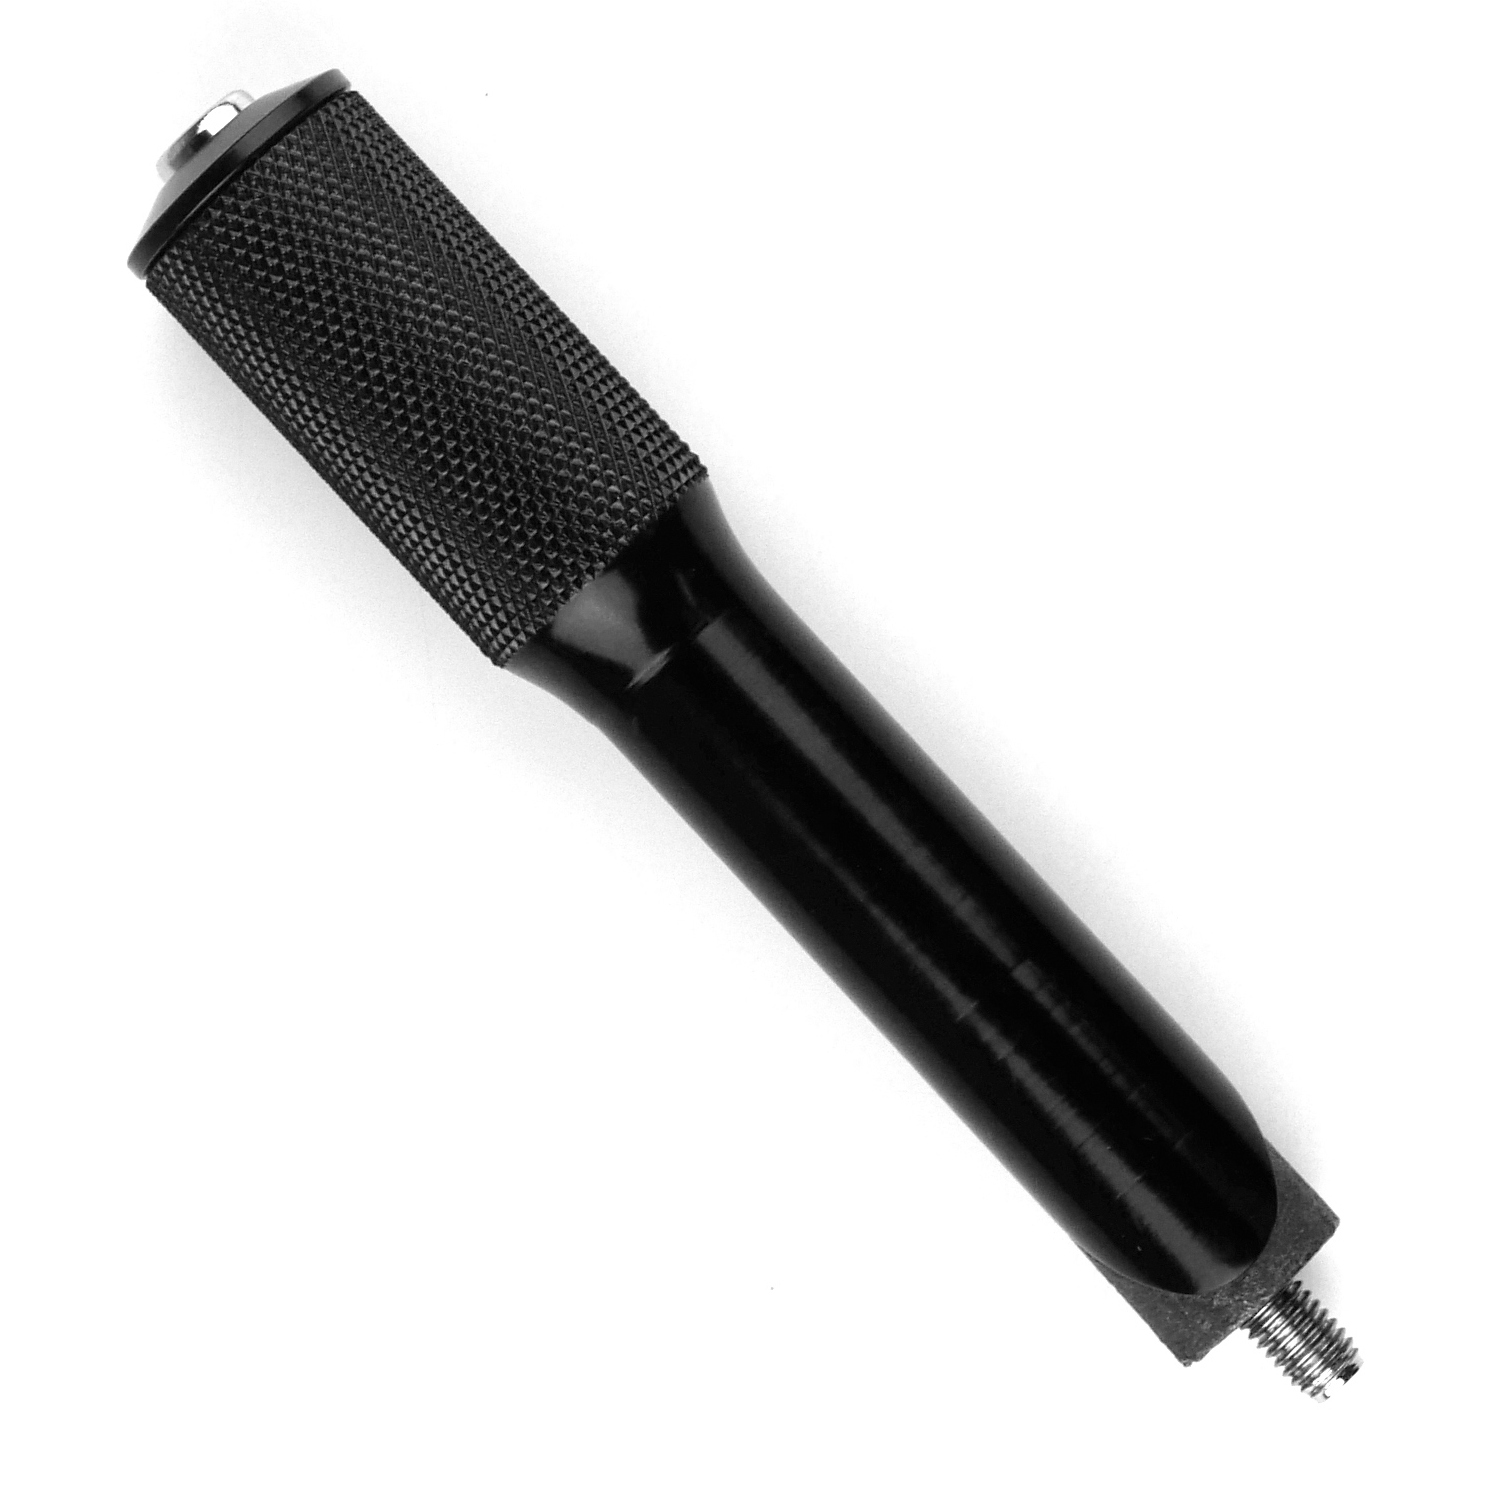
The VO Removable Faceplate Quill Stems have finally arrived! In case you missed previous blog posts about them, they're designed for 1" threaded steerers and have 31.8mm handlebar compatibility. No longer do you need to undo your beautiful bar wrap to change stems, and no more scratching brand new bars snaking them through the stem's clamp. Additionally, you can now use any and all weird alt-bars that are available on the market. So put Crazy Bars on your townie! Put Far Bars on your vintage MTB for a weekend tour! Or simply put one on your travel bike for ease of packing. Go nuts, they're MTB rated ;)

They're available in three top-notch finishes to fit any build: Hi-Po Chrome, Noir, and Brushed Nickel. Lengths range from 80mm to 110mm in 10mm increments.


In addition to these stems, by popular demand, we made a 1" Threaded Steerer Adaptor for our Cigne Stems. We'd suggest picking up a pair of 1" 5mm headset spacers to match your Cigne Stem and headset, otherwise you'll have a gap between the bottom of the stem and the top of the locknut.


For those of us with 1" headsets, the possibilities are now endless! What will you run?

17 August, 2017

Stack Em Up!

By Scott

Headsets don't get a lot of love. They are the 12th man of a cricket team, the pinch runner for a baseball squad, or the back up goalie for a hockey team. They tend to get forgotten until servicing or replacement is needed.


When the time comes to pick a headset, you need to do a bit of research and measuring. For the purposes of this post, I'm going to delve into the concept of stack height and how it relates to fitting a headset to a frame. While the discussion is directed at threaded headsets, threadless headsets use some similar math. So if you are swapping out a threadless headset, you have to allow for the stack height of the stem in addition to the headset.


So lets start out with our Campeur frame and fork. I'd like to install the 1 inch threaded Grand Cru headset. Now I have to figure out if it will fit (spoiler alert - all VO frames are designed to be 100% compatible with our headsets). To help determine this, I'll need a metric tape measure. If you don't have a tape measure marked in both metric and imperial, pop down to your local hardware store and grab one. It makes it so much easier for this project and for future ones as well.

I need three measurements to determine if my chosen headset will fit: 1) the stack height of the intended headset, 2) the length of the head tube, and 3) the length of the steerer tube. The stack height of the headset is the overall height of the headset once installed and should be found on the manufacturer's documentation. The head tube length can be measured with your tape measure. Simply measure the length of the head tube - don't include the existing cups or anything, just the head tube. To measure the steerer tube, you will need to remove the fork and measure from the top of the crown to the top of the steerer.


So I go to the web page for the headset and it says the stack height is 42 mm. This means that the top cup, lower cup, crown race, and lock nut take up 42 mm of vertical space. When I measure the steerer tube, I get a measurement of 207 mm.


The next measurement to take is the length of the head tube. In this case, it comes out to 155 mm.

So here is where the math comes in. The steerer tube is 207 mm. The head tube is 155 mm. Subtracting the head tube (155) from the steerer tube (207) equals 52 mm. This number is greater then 42 mm, so I can fit the headset and have room for a cable stop (about 3 mm thick) plus some spacers between the cable stop and the lock nut.

(Lots of room for a cable stop and some spacers)

We've always made the steerer tube on our bikes long enough to ensure there is room for a cable stop and differing heights of headsets. Some older racing bikes from the 70's had really low stack heights that means adding a modern headset with sealed cartridge bearings impossible. Is anyone interested in a low stack height headset with cartridge sealed bearings for those older bikes?

14 August, 2017

Overnight on the NCR with a Fuzzy Friend

by Igor

Last weekend, Adrian and I did an overnight on the Northern Central Railroad Trail, officially known as the Torrey C. Brown Trail, and Heritage Rail Trail. It's a terrific, off-road MUP that starts in Cockeysville, MD and ends in York, PA - the combination of two trails make up the length of the ride. With a distance of 40 miles each way, about 20 miles on each trail, and little elevation change, it's the perfect leisurely overnight tour for us and our fuzzy 5-year old, Stella.

Packing for an overnight with your dog is pretty much the same as packing without. Just add a few scoops of dog food for the time you will be out and make sure you have extra water if it's not abundantly available on the trail. Stella is a well seasoned outdoors dog, so she's happy with a stick and any patch of ground or spot on your sleeping pad - no need for any toys or bed.
The Maryland side of the trail, the NCR, is more like the C&O - bit rocky and uneven, turning into double track about 10 miles in. Stella was a trooper, standing in the trailer for the first 20 miles to make up for the uneven terrain.

The Heritage Trail on the PA side is super well taken care of. The terrain is mainly crushed, dusty stone with frequent train track crossings - very reminiscent of the Great Alleghany Passage. Small trail towns dot the route and are nice stops to pick up provisions and see some of the local landscape. These stops also lend themselves well for dogs to stretch their legs and get lots of pets from anyone walking by.
Chances are, your pup will be tired from all of the activities of the day and will rest easy. It's important to get your fuzzy companion acclimated to sleeping in a tent early-on, so they aren't startled by the random woodsy noises that go on during the night.
A bit of advice for first time fuzz-butt haulers, which I guess could apply to non-fuzz-butt hauling as well (kids):
  • Initial training is easier with two people on a secluded road. One is in front towing, the other is behind giving positive encouragement and treats.
  • Get low gearing. Dogs and trailers are heavy and hills are not forgiving.
  • Bring extra food and water for you and your pup.
  • Slowly increase the distance of your ride until your pup, (and you!), are comfortable with longer distances.
  • Scan for obstructions in the road earlier than normal.
  • Keep your speed in check going downhill.
Do you take your dog/cat/lizard/snake out with you during your rides?

07 August, 2017

A Discussion of Shims

By Scott

Sometimes we get attached to things for no rational reason, but more an emotional one. If you suffer from Sable (see the post here), you might have an old WTB (that's Wilderness Trail Bikes) dirt drop bar and want to use it on a build. Or perhaps you have an awesome stem, but the clamp size does not match any bar you have. This is where shims come into play.


Let's start out with the basics first - stem clamp size - which is the diameter of the handlebar where the stem attaches. Up until the 2000's there were four sizes: 25.0 mm for French bars, 25.4 mm for the flat bar/mtb bars, 26.0 mm for road bike bars, and 26.4 mm for the Italian bars, mostly Cinelli.

In the last 15 years, we've gained a new "standard" of 31.8 mm diameter. So now, there are five standards, of which two (25.4 mm and 26.0 mm) remain very popular, one size dropped off (25.0 mm), one size remained the bastion of one country only (26.4 mm), and one size (31.8 mm) rose in popularity as carbon bars became more popular and people wanted "stiffer" handlebars for those county limit sign sprints.

Side bar: In our design work, we look at all these "standards" and work with and around them to make our products. For instance, we did the Crazy bar in a 25.4 mm size, so that you could use a shim if you opted for a 26.0 mm or 31.8 mm stem. The tricky part is when you have a 31.8 mm bar. You can only use a 31.8 mm stem. If you can find a way to use 31.8 mm bar with a 26.0 mm stem, don't call us, call Stockholm and talk to the Nobel Prize committee.

Choosing a shim is a two part operation. Step one is figuring out the parts you have. What is the stem clamp area for the bars and what size bars does the stem take? If you want a Tall Stack Stem (31.8 mm) but are devoted to Chris's Rando Bar (26.0 mm), you'll need a shim that works to bridge the difference between 26.0 to 31.8. So you'd go to our stems page and look at the variety of shims there. You'd see two types that match our mathematical specification - a four piece and a two piece set. Which to choose? If your stem has a two bolt faceplate, like the Cigne stem, go with the two-piece shim set. If your stem has a four bolt faceplate, you can use either the four or two bolt shim set.


What if we swap out the scenario? Let's say you have a quill stem, like a VO quill stem (26.0 mm) and you want to use a Postino bar (25.4 mm) for a more upright position. So you'll look on the quill stem page and see one option for shims, but in two widths. What width do I want? 35 mm wide shims would fit most one bolt stems. You need the thickness only in the middle area of the stem where the clamp bolt is. It's only on a threadless stem with a wider clamp area that you want to use the 45 mm wide model.

So don't be afraid to pull out that bar or stem and use it. Do some math/measurements or search The Google for information on it and go from there. There must be some bars or stems waiting to be put to use with a new build.

01 August, 2017

20% off Frames!

by Igor

Update: The sale has concluded. Thank you for everyone who participated. Happy riding!

Welcome to August! The Polyvalents are going through one more round of revisions and testing before they are approved to go into production. Our tentative schedule is to have them at VO World Headquarters by early Spring 2018, just in time for the season. Until then, we need to clear out a bit of shelf space to prepare for their arrival. So....


For the next week, we will be offering 20% off all in-stock framesets. This includes CampeurPass Hunter, and XL Piolets.

No coupon code needed! Our VO Dealers get the deal, too. Don't forget about the 10% component and accessory discount when you order a frame.


In addition, we have just put up several paint blem'd frames. In case you didn't know, every single frameset gets pulled out of the box and inspected before leaving. Every now and again, we do find one with an imperfection. You can check them out on the discounted frame page.

The fine print:
  • The sale will run from this moment to Tuesday, August 8th, 11:59pm ET.
  • No backorders
  • Only applicable to in-stock framesets
Happy riding!

27 July, 2017

Igor's Country Rambler - 650b Pass Hunter

by Igor

Let me preface this article with a few words of caution. Obviously, using a narrower rim will yield narrower tires, and vice-versa. The front has lots of room, the rear chainstays are pretty tight. Tight enough that I can't recommend anyone do this specific conversion. I could have dimpled the chainstays for extra clearance, but I felt it wasn't necessary for now. Additionally, I wanted to use as many regular hand tools as possible. Narrower tires like the Pari-Motos or other ~42mm tires would make fender installation easier. That said, enjoy!


Ever since the Polyvalent prototypes came in, a 650b itch has developed. I tried calamine lotion, anti-histamines, wearing gloves, and even bathing in tomato juice - nothing worked. So instead, I embraced it. Fueled by inspiration and Clint's OutoftheBasement Brew® coffee, I decided to 650b my Pass Hunter Disc.


Right away, I noticed that the chainstays were potentially going to be an issue. I mounted WTB Horizon 47mm tires on 28mm wide rims and let them age for a few days. They seemed to have hit a stasis of 46.8mm after a few days. The chainstay clearance is tight, but manageable. The overall diameter of this setup is roughly the same as the Fairweather 700x28s I had previously mounted, but with extra confidence to roll over the grates on the bridges we have around here going into and out of town.

I could have called it a day, posted some photos on IG, and been showered in virtual hearts. Instead, the bike screamed for fenders - it is a VO frame, after all. I managed to massage, crimp, and adjust our 700x63mm Fluted Fenders to fit the curvature of the wheel. In the following photos, you can see how things line up and where they needed "encouragement".


Specifically on these fenders, the section that mounts to the chainstay bridge has a sort of "tongue" to allow it to fit into more bikes. Additionally, you'll notice the fender is crimped behind the front derailleur. It isn't a dent. That's how it comes stock to allow a derailleur to travel into the smaller ring without interference.


Finishing touches were put on - a prototype Randonneur Front Rack with the fender mounted. This combination was a cinch to install and makes a really simple and strong connection.


Here I come, #basketlyfe! 

-----------------------------------------

Don't forget to sign up for our Bulletin. You'll get info about upcoming products, sale coupons, future events, tips n' tricks, and general goings-on. We'll only send them out once a month or so, and they'll be short and sweet.

Everyone can sign up here and dealers have one, too.

19 July, 2017

The Great Brake Debate

By Scott

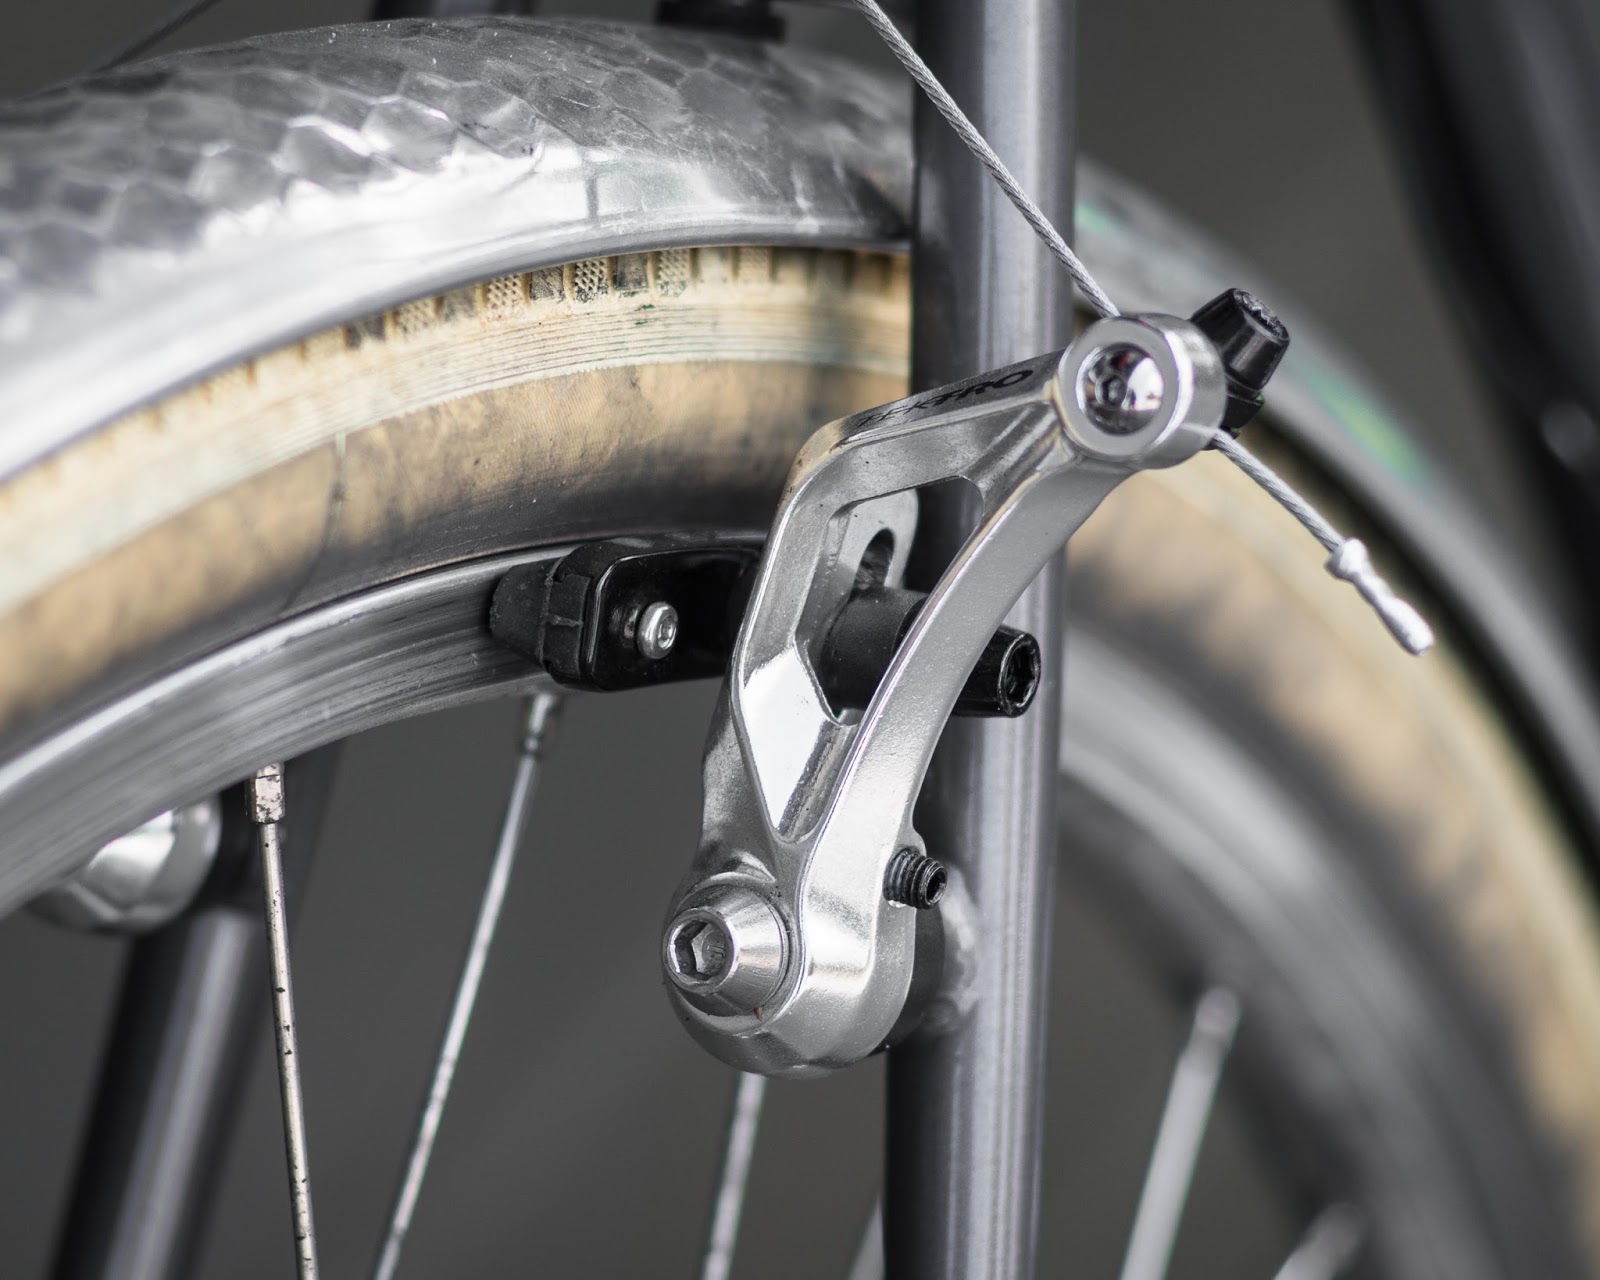
Brakes are something that we all have on our bikes. The kind of brake you have is something that has dramatically changed in the last decade or so. The controversy between disc and canti brakes was at it's cusp about 5 years back, but we've had a flow of emails recently asking about disc brakes due to the continued testing of the Polyvalent (with disc brakes for 2018).


A curious side note to these emails is the the preference of brakes varying by location. We've found that folks in the Pacific Northwest are asking for disc brakes and paradoxically, our Thai market reports that the majority of their customers prefer rim/cantilever brakes on their frames. I thought we might look into the world of brakes and see what the pros and con's are for the two major brake types that we at VO use on our frames - disc brakes and cantilever brakes.

To frame this comparison, I'd like to say that I have used both styles of brakes. I've used BB7s on the Polyvalent prototype and liked them. My standard ride for many years is a touring bike with the Tektro CR710 brakes installed.

One of the first things that people talk about with disc brakes is the stopping power. As disc brakes started with MTB's, it makes sense. You want to stop on a dime before you go over that cliff face. It is probably the most obvious advantage to a disc brake bike, the increase in braking performance vs a cantilever brake. It certainly inspires confidence when you are coming down a steep col/pass/gap and need to scrub off speed when sheep start to cross the road in front of you.

When I installed the CR710's on my bike, they were dead easy to set up. They are similar to the Zeste brakes in that each side has a set screw to adjust the spring tension. Tighten or loosen as needed and then tighten the set screws on the straddle hanger when the pads are even and you are good to go. Now I'm not the greatest mechanic at times (ask my wife, she'll tell you. On second thought, don't ask. It brings up old issues that I don't need to be reminded of), but setting up disc brakes was a bit of a pain in the butt. Maybe this is a case of not doing it enough, but they seemed fiddly in comparison to the cantilever brakes, which were so simple to adjust.

One edge for cantilever brakes is that they are lighter than disc brakes. If you look at the weight of two canti brakes (one wheel's worth) you are looking at about 146 gr. If we compare that to the weight of a BB7 brake set up- rotors (160 mm for reference), caliper and mounting hardware- that weighs 351 gr.  So about half the weight, even if you take into account some extra bits like cable stops and straddle hangers.


Another aspect that bears considering with disc brakes is the replacement of the braking surface. When I lived in Vancouver and commuted daily on a bike with cantilevers through out the year, I would wear out a front wheel once a year or so. The constant moisture in the air combined with the grit that the pads pick up and impart on the rim would wear down the rim faster then I have seen anywhere else. The first time I saw a disc brake randonneur set up, I asked my friend how he liked it and he said it was great. You only have to replace the rotor every year, not the whole rim. Wow, mind blown.


Is the style of brake on a bike something that is important to you? Does one or the other make you come to a screeching halt when looking at a new frame? Weigh in below with your comments.

07 July, 2017

Porteur Packing

By Scott


(All you need for a weekend away)

So, as I mentioned in my last post, I've been on more multi use trails the last while. This past long weekend, my wife and I took advantage of what looked like good weather and the extended weekend to head up to north central PA to ride the Pine Creek rail trail. It's a very scenic rail trail that runs for the majority of it's 62 mile length alongside the Pine Creek in a lovely valley. We wanted to do it in 3 days round trip - a short day on Saturday, as we had travel up from MD to the start in Jersey Shore PA, a mid length day on Sunday to Wellsboro, and then a long downhill day on Monday back to Jersey Shore. We were using motels along the route, so we cut our cycle clothing down to two shirts and two shorts each, plus one outfit - shorts and a collared shirt for me, a nice dress for my wife - for off the bike. We kept the toiletry kit down to a minimum and carried sandals for walking around.  We put our gear into an old Ortlieb rack bag (designed for motor cycles) that we bought about 20 years back for sea kayaking and I strapped it to the front porteur rack of the Polyvalent prototype I was riding. The side straps went around the side rails of the rack, like our Porteur bag does. I even stuffed a 2 litre bottle of water between the bag and the back rack rail, just so we would have extra water on hand during the ride.  A bungee over the top of it, ensured that it stayed in place on even the roughest part of the trail.

(Yep, bell attached around the quill part of the stem adapter)

One of the pluses of porteur packing is that when you are carrying so little, checking the room before you leave, to ensure you have not left anything, is easy. We put our clothes into a stuff sack each, so it was easy to keep track of whose was what (black shorts have a tendency to look very similar). But otherwise, it was dead easy to throw the chargers for the phone, sandals and the toiletry kit just loose into the bag and bring it all into the motel room.

                    
Is porteur packing overkill? My wife asked me this last night over supper. I said no. The wide platform of the rack is great for using what ever bag you have. Due to the lack of rain over the three days, I could have gotten away with just a cheap nylon bag. But the rack works with something like the Porteur bag if you want to have a bag that fits it exactly. The handling was fine. I figure we had about 15 pounds or so in the bag plus 4 pounds of water  and the Polyvalent had neutral handling throughout the trip. 


So for trips like ours, where motels are involved (substitute hostels if you want, it's all up to individual preference and geography), I really liked using a single bag. It made moving gear from the bike to the room easier, the larger opening was great to put stuff into and the handling never felt uneasy.