
by Clint

Intro
If you missed it, Part 1 of Pass Hunting was the story of our trip. In this part, I’d like to talk about the gear we used for our tour.
The Bike
In my view, the Pass Hunter is the most versatile bike in our lineup and the bike I find myself spending the most time on. Modern component standards and geometry equally suited for riding uphill and downhill make it a great all rounder.
You can dress it up with a carbon fork to turn it into a fast gravel bike (check out Clint’s at Blue Lug’s carbon spork Pass Hunter) or upright bars for a fun townie build (check out Blue Lug Yoyogi Park’s upright townie build). On this ride, I wanted to show that it is equally capable as a light(ish) touring bike. The ride required elevation gains and descents, traveling over mountain passes, and mixed/dirt roads - the Pass Hunter seemed like the obvious choice!
Gear
Loading up a touring bike is more difficult than I remember! It’s been a while since I’ve packed this much stuff.
 |
| Where does it all go? |
Packing for a 5 day trip felt similar to packing for a much longer trip. Once you have enough stuff for that amount of time, I think you can just refuel and keep riding…indefinitely. Our supply requirements for the trip were preparing for:
- Temperatures between 34 degrees and 90 degrees
- Harsh sun and rain
- Enough food for 48hrs between refuels
- Camping gear
- Spare parts for being up to a day’s ride away from a gear shop
Luckily we were next to water for the majority of the ride so we were able to bring a water filter and stay hydrated without lugging around a lot of water weight at any given time. Other than that, I brought drawing supplies and camera gear for entertainment. Rico brought fishing gear (again next to water the whole time, and gold medal fishing waters at that!)
.jpg) |
| Gold metal fishing waters, baby. |
Handling Preferences
Some of my handling preferences aren’t completely practical for touring, but I’d describe my riding style as maybe more “spirited” than your traditional sit-and-spin tourist. I like a little more maneuverability on the bike for some silly stuff. I’ll split up my handling preferences into two categories - weight distribution and fit.
On weight distribution - I like weight to be tight to the frame. Shaky, swaying weight on a bike drives me a little nuts. While it may be easier to dump everything in panniers and call it a day, I appreciate the compression on modern bike packing baggage (like the Road Runner Jammer), that keeps things from swaying back and forth on a bike.
On fit - I ride flat bars on all my bikes. I like the control they give me - especially to throw around weight on a touring bike. While not always practical, I have a few different hand positions I rotate between to keep my wrists happy and ultimately I have the most fun when I’m riding flat bars. The flat bars we used on tour are special and they deserve their own section of the blogpost.
The Bars
Since the secret is out, I’ll talk a little bit about the upcoming Utility Bars. They were a pretty key component in loading for both my touring setup and Rico’s. I’m really excited for these to hit the market (hopefully Spring 2023).
.jpg) |
| Rico's Rig ft. Utility Bars |
Figuring out where to store gear on a bike can be a little tricky so I hope this rack system can simplify things for folks. It’s meant to work on just about any bicycle. All you need is a standard 31.8mm diameter stem!
This rack is super height adjustable. Sometimes it’s difficult to have a handlebar mounted bag on a smaller sized frame without the bag sagging into the tire. This provides a solution for shorter riders, with no compromises for taller folks. The rack can be lowered for taller riders with bigger headtubes to keep the weight low. In our instance we used this adjustability for something kind of weird. I stored my tent and sleeping back on the underside of the rack - check it out!
 |
| Double decker storage on Utility Rack. |
Lashing stuff to the underside of the rack left things accessible and took advantage of all of the mounting points of the Utility rack.
Outside of the tour, I use the Utility Bar around town as a quick lashing point for a variety of bags - a messenger bag, our Transporteur Bag, and our Biggish Bag. Strap it on with a bungee cord and you’re good to go. My biggest beef with bikepacking bags is that they swing around a lot or they’re difficult to put on/take off the bike - which if you ride near a city and occasionally have to leave the bike unattended you’ll know why this is important. This rack system solves both of those problems for me. I look forward to seeing all the creative ways folks use this rack in the future.
 |
| No rack mounts? No problem! |
For some even geekier analysis of weight distribution, my preferences are to keep the weight tighter to the frame vs keeping the weight low. A traditional pannier setup is going to keep your weight lower, but further out from the steering axis. Personally, I find weight distributed closer to the steering axis to be more maneuverable. It feels lighter in the steering. It’s similar to how folks load up mountain bikes for touring with handlebar rolls or similar bags. By the way, this handlebar is MTB rated if you want to take it on singletrack.
The Brakes
Rico and I both sported the new Growtac Brakes we offer and I’ve gotta say, it was one of the best decisions we made. Obviously I’m biased, but I think they’re the best mechanical brakes at their price. Not the cheapest on the market for sure, but I think they offer good value. I’ve been riding a pair of these since we started talking to Growtac and I feel like I have enough miles to speak knowledgeably. So here’s my little product review.
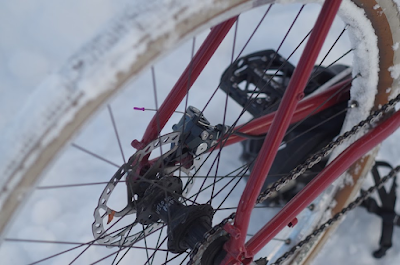 |
| A younger, cleaner Pass Hunter with new brakes from last winter. |
Power is the first thing everyone talks about with these brakes. They have so much power. I think they compete with a lot of hydraulic brakes at that, but I would like to emphasize a different point about these brakes. To me, the thing that sets them apart from the rest is that they’re easy to install and maintain. I think serviceability is a point that draws a lot of folks to mechanical disc brakes in the first place (vs hydraulic disc brakes), and these exemplify that quality for me.
Just a little background on my experience, I am ready to admit to the public that I am a VERY OK mechanic. I’m proficient and I get by. I’ve wrenched on just about everything on a bicycle, but I’m not the fastest, nor am I the best at “dialing it in,” but I think that perspective is important. The adjustments are simple on these brakes and I get more than enough performance at my mechanic ability. Sure a professional mechanic can get more performance out of these, but I want to emphasize how user friendly these brakes are for the at-home mechanic such as myself.
I’d like to tie both of these points - power and user friendliness, into how important they were on tour. The power was great on long wet descents. It rained a lot and the bikes were heavy. The user friendliness allowed us to make any adjustments as needed while out of the shop and on the road.
The Bags

Last but not least, I’ve gotta talk about the bags. Road Runner has been a pleasure to work with for the past 5 years or so and their bags are incredible.
As mentioned before, it rained A LOT on our tour. We were constantly changing in and out of rain gear and drying off clothes. I don’t know how they do it, but those folks from the dry city of Los Angeles certainly know how to make waterproof bags. I didn’t have to worry once about our important gear and electronics getting wet. Here are the bags I used:
VO x RRB Porteur Bag. My sleeping bag and puffy jacket were in here. Both remained completely dry until I put our water filter in there. User error.
VO x RRB Biggish Bag. I kept this on the saddle for bulky, but quick access things. A quick change of clothes, food, etc. Again - very dry in there!
RRB Wedge Half Frame Bag. I kept all of the tools and spare tubes in here. I keep my multitool in the non-drive side quick access pouch for adjustments on the fly. Nothing in here needed to stay dry, but it did!
RRB Bluff Bag. I kept quick access snacks in here. It has a generous snack capacity but still doesn’t flop around when mounted to the top tube. The zipper is easy to operate with one hand while riding. Also as with the frame bag - nothing in here really had to be dry but it also stayed dry.
RRB Little Guy Hip Pack. I kept space camera batteries and a 2nd lens in here along with a few other quick access things. Very convenient. Very dry.
RRB Co-Pilot. I kept my phone and sunglasses in here. Easy to access. Very pleased with the cockpit setup.
Blue Lug Stem Bag. Great bag! Cute colors and great capacity. Big enough to toss my compact camera in there for when I didn’t want to ride with it on my back.
Various dry bags. Two 5L bags on the fork and a larger one under my Biggish bag. All held my clothes. ‘Nuff said.
Also worth mentioning - my RRB Camera strap! Easy to ride with. Has a quick cinch that secures it to your chest to keep it from bouncing around and easy to undo for a quick photo!
Conclusion
I hope this post has some vaguely useful information to get you going on your next tour. Touring takes a lot of planning and equipment. I’m happy to answer any other questions about the stuff we brought along. There’s a lot more stuff I didn’t mention here.
Equipment-wise, next time I’m interested to use some of the rack stuff we’ve got in the works. If we plan ahead more, I’d like to try my hand at dehydrating some meals. While those premade dehydrated meals are convenient and taste amazing when you’re really hungry, I wouldn’t mind using less disposable packaging. If anyone has recipe recommendations, hit me up. My sleeping equipment could use a little work. I’d be interested in experimenting with a tarp setup. Also send that info my way if you have a good (and affordable) tarp system. I also need to patch my inflatable sleeping pad. The foam accordion pad I used during this trip wasn’t quite enough padding for my 🍑. Other than that, we used just about everything we brought and there was very little else we wished we had packed. Except for Rico’s rain jacket. It was missed.

Happy Riding!


No comments:
Post a Comment