31 August, 2017

Labor Day Decisions

By Scott

So now we're coming up on Labor day (Labour Day to our friends north of the border) and we just wanted to give folks a heads up that we'll be closed on Monday, September 4th. We'll do our best to get all the orders placed on Friday out before we close/pick ups happen.

(Soon enough the roads are going to be lined with trees like this around here.)

We'll be back in the office on Tuesday the 5th at 9 am answering emails, calls and welcoming folks to VO HQ.

Hope you can get out and enjoy the long weekend.


22 August, 2017

Re-stocked on VO Goodies and Bullmoose Bars

by Igor

In addition to the new Faceplate Quill Stems, we also restocked on a number of products that you guys and gals have been patiently waiting on:


In addition to VO products, we also just got in a care package from Fairweather in Japan with a bunch of Bullmoose Bars in Silver and Black finishes.

Happy riding!

19 August, 2017

Removable Faceplate Quill Stems Have Arrived!

by Igor


The VO Removable Faceplate Quill Stems have finally arrived! In case you missed previous blog posts about them, they're designed for 1" threaded steerers and have 31.8mm handlebar compatibility. No longer do you need to undo your beautiful bar wrap to change stems, and no more scratching brand new bars snaking them through the stem's clamp. Additionally, you can now use any and all weird alt-bars that are available on the market. So put Crazy Bars on your townie! Put Far Bars on your vintage MTB for a weekend tour! Or simply put one on your travel bike for ease of packing. Go nuts, they're MTB rated ;)

They're available in three top-notch finishes to fit any build: Hi-Po Chrome, Noir, and Brushed Nickel. Lengths range from 80mm to 110mm in 10mm increments.


In addition to these stems, by popular demand, we made a 1" Threaded Steerer Adaptor for our Cigne Stems. We'd suggest picking up a pair of 1" 5mm headset spacers to match your Cigne Stem and headset, otherwise you'll have a gap between the bottom of the stem and the top of the locknut.


For those of us with 1" headsets, the possibilities are now endless! What will you run?

17 August, 2017

Stack Em Up!

By Scott

Headsets don't get a lot of love. They are the 12th man of a cricket team, the pinch runner for a baseball squad, or the back up goalie for a hockey team. They tend to get forgotten until servicing or replacement is needed.


When the time comes to pick a headset, you need to do a bit of research and measuring. For the purposes of this post, I'm going to delve into the concept of stack height and how it relates to fitting a headset to a frame. While the discussion is directed at threaded headsets, threadless headsets use some similar math. So if you are swapping out a threadless headset, you have to allow for the stack height of the stem in addition to the headset.


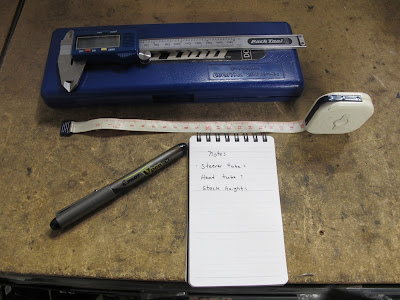
So lets start out with our Campeur frame and fork. I'd like to install the 1 inch threaded Grand Cru headset. Now I have to figure out if it will fit (spoiler alert - all VO frames are designed to be 100% compatible with our headsets). To help determine this, I'll need a metric tape measure. If you don't have a tape measure marked in both metric and imperial, pop down to your local hardware store and grab one. It makes it so much easier for this project and for future ones as well.

I need three measurements to determine if my chosen headset will fit: 1) the stack height of the intended headset, 2) the length of the head tube, and 3) the length of the steerer tube. The stack height of the headset is the overall height of the headset once installed and should be found on the manufacturer's documentation. The head tube length can be measured with your tape measure. Simply measure the length of the head tube - don't include the existing cups or anything, just the head tube. To measure the steerer tube, you will need to remove the fork and measure from the top of the crown to the top of the steerer.


So I go to the web page for the headset and it says the stack height is 42 mm. This means that the top cup, lower cup, crown race, and lock nut take up 42 mm of vertical space. When I measure the steerer tube, I get a measurement of 207 mm.


The next measurement to take is the length of the head tube. In this case, it comes out to 155 mm.

So here is where the math comes in. The steerer tube is 207 mm. The head tube is 155 mm. Subtracting the head tube (155) from the steerer tube (207) equals 52 mm. This number is greater then 42 mm, so I can fit the headset and have room for a cable stop (about 3 mm thick) plus some spacers between the cable stop and the lock nut.

(Lots of room for a cable stop and some spacers)

We've always made the steerer tube on our bikes long enough to ensure there is room for a cable stop and differing heights of headsets. Some older racing bikes from the 70's had really low stack heights that means adding a modern headset with sealed cartridge bearings impossible. Is anyone interested in a low stack height headset with cartridge sealed bearings for those older bikes?

14 August, 2017

Overnight on the NCR with a Fuzzy Friend

by Igor

Last weekend, Adrian and I did an overnight on the Northern Central Railroad Trail, officially known as the Torrey C. Brown Trail, and Heritage Rail Trail. It's a terrific, off-road MUP that starts in Cockeysville, MD and ends in York, PA - the combination of two trails make up the length of the ride. With a distance of 40 miles each way, about 20 miles on each trail, and little elevation change, it's the perfect leisurely overnight tour for us and our fuzzy 5-year old, Stella.

Packing for an overnight with your dog is pretty much the same as packing without. Just add a few scoops of dog food for the time you will be out and make sure you have extra water if it's not abundantly available on the trail. Stella is a well seasoned outdoors dog, so she's happy with a stick and any patch of ground or spot on your sleeping pad - no need for any toys or bed.
The Maryland side of the trail, the NCR, is more like the C&O - bit rocky and uneven, turning into double track about 10 miles in. Stella was a trooper, standing in the trailer for the first 20 miles to make up for the uneven terrain.

The Heritage Trail on the PA side is super well taken care of. The terrain is mainly crushed, dusty stone with frequent train track crossings - very reminiscent of the Great Alleghany Passage. Small trail towns dot the route and are nice stops to pick up provisions and see some of the local landscape. These stops also lend themselves well for dogs to stretch their legs and get lots of pets from anyone walking by.
Chances are, your pup will be tired from all of the activities of the day and will rest easy. It's important to get your fuzzy companion acclimated to sleeping in a tent early-on, so they aren't startled by the random woodsy noises that go on during the night.
A bit of advice for first time fuzz-butt haulers, which I guess could apply to non-fuzz-butt hauling as well (kids):
  • Initial training is easier with two people on a secluded road. One is in front towing, the other is behind giving positive encouragement and treats.
  • Get low gearing. Dogs and trailers are heavy and hills are not forgiving.
  • Bring extra food and water for you and your pup.
  • Slowly increase the distance of your ride until your pup, (and you!), are comfortable with longer distances.
  • Scan for obstructions in the road earlier than normal.
  • Keep your speed in check going downhill.
Do you take your dog/cat/lizard/snake out with you during your rides?

07 August, 2017

A Discussion of Shims

By Scott

Sometimes we get attached to things for no rational reason, but more an emotional one. If you suffer from Sable (see the post here), you might have an old WTB (that's Wilderness Trail Bikes) dirt drop bar and want to use it on a build. Or perhaps you have an awesome stem, but the clamp size does not match any bar you have. This is where shims come into play.


Let's start out with the basics first - stem clamp size - which is the diameter of the handlebar where the stem attaches. Up until the 2000's there were four sizes: 25.0 mm for French bars, 25.4 mm for the flat bar/mtb bars, 26.0 mm for road bike bars, and 26.4 mm for the Italian bars, mostly Cinelli.

In the last 15 years, we've gained a new "standard" of 31.8 mm diameter. So now, there are five standards, of which two (25.4 mm and 26.0 mm) remain very popular, one size dropped off (25.0 mm), one size remained the bastion of one country only (26.4 mm), and one size (31.8 mm) rose in popularity as carbon bars became more popular and people wanted "stiffer" handlebars for those county limit sign sprints.

Side bar: In our design work, we look at all these "standards" and work with and around them to make our products. For instance, we did the Crazy bar in a 25.4 mm size, so that you could use a shim if you opted for a 26.0 mm or 31.8 mm stem. The tricky part is when you have a 31.8 mm bar. You can only use a 31.8 mm stem. If you can find a way to use 31.8 mm bar with a 26.0 mm stem, don't call us, call Stockholm and talk to the Nobel Prize committee.

Choosing a shim is a two part operation. Step one is figuring out the parts you have. What is the stem clamp area for the bars and what size bars does the stem take? If you want a Tall Stack Stem (31.8 mm) but are devoted to Chris's Rando Bar (26.0 mm), you'll need a shim that works to bridge the difference between 26.0 to 31.8. So you'd go to our stems page and look at the variety of shims there. You'd see two types that match our mathematical specification - a four piece and a two piece set. Which to choose? If your stem has a two bolt faceplate, like the Cigne stem, go with the two-piece shim set. If your stem has a four bolt faceplate, you can use either the four or two bolt shim set.


What if we swap out the scenario? Let's say you have a quill stem, like a VO quill stem (26.0 mm) and you want to use a Postino bar (25.4 mm) for a more upright position. So you'll look on the quill stem page and see one option for shims, but in two widths. What width do I want? 35 mm wide shims would fit most one bolt stems. You need the thickness only in the middle area of the stem where the clamp bolt is. It's only on a threadless stem with a wider clamp area that you want to use the 45 mm wide model.

So don't be afraid to pull out that bar or stem and use it. Do some math/measurements or search The Google for information on it and go from there. There must be some bars or stems waiting to be put to use with a new build.

01 August, 2017

20% off Frames!

by Igor

Update: The sale has concluded. Thank you for everyone who participated. Happy riding!

Welcome to August! The Polyvalents are going through one more round of revisions and testing before they are approved to go into production. Our tentative schedule is to have them at VO World Headquarters by early Spring 2018, just in time for the season. Until then, we need to clear out a bit of shelf space to prepare for their arrival. So....


For the next week, we will be offering 20% off all in-stock framesets. This includes CampeurPass Hunter, and XL Piolets.

No coupon code needed! Our VO Dealers get the deal, too. Don't forget about the 10% component and accessory discount when you order a frame.


In addition, we have just put up several paint blem'd frames. In case you didn't know, every single frameset gets pulled out of the box and inspected before leaving. Every now and again, we do find one with an imperfection. You can check them out on the discounted frame page.

The fine print:
  • The sale will run from this moment to Tuesday, August 8th, 11:59pm ET.
  • No backorders
  • Only applicable to in-stock framesets
Happy riding!